

How to cut the cat’s nails safely starts with one principle: do less than you think. Most nail-trimming fights happen because the owner tries to finish all four paws in one session, holds the cat too tightly, clips too much claw, or waits until the cat is already angry. A better routine is short, calm, predictable, and reward-based.
For cats already using structured routines, a 2L smart pet feeder for regular feeding can help make daily care calmer by keeping meals predictable. Nail trimming is easier when the cat is not hungry, overstimulated, or expecting food on demand. The right answer to how to cut the cat’s nails is not force. It is timing, handling, correct tools, and stopping before the cat panics.
Direct Answer: How to Cut the Cat’s Nails
How to cut the cat’s nails safely is to use a sharp cat nail clipper, choose a calm moment, hold one paw gently, press the toe pad to extend the claw, identify the clear sharp tip, avoid the pink quick, clip only the small hook-shaped end, reward the cat immediately, and stop after one or two nails if the cat becomes tense. Do not cut into the pink quick because it can bleed and hurt. If you cannot clearly see the quick, trim only the very tip or ask a veterinarian or groomer to show you.
The safest first session may be only one nail. That still counts as progress. Cats learn from patterns. If every nail trim ends before panic, the cat becomes easier to handle over time. If every trim becomes a wrestling match, the cat learns to resist earlier.
Why This Matters
Cat nails grow in layers. Scratching helps shed outer claw sheaths, but indoor cats can still develop sharp tips, overgrown claws, snagging, furniture damage, and painful pressure if nails are ignored too long. Senior cats, inactive cats, and cats with arthritis may need closer nail checks because they may not scratch enough to maintain claws naturally.
The AAFP’s declawing position statement lists claw trimming and scratching-surface management as non-surgical tools for managing scratching behavior. The ASPCA’s position statement on declawing cats also points owners toward humane alternatives for destructive scratching.
That is why how to cut the cat’s nails belongs inside a broader claw-care system: nail trims, scratching posts, furniture protection, enrichment, and calm handling.
What To Do First
Start by choosing the right tool. Use a small, sharp cat nail clipper or pet nail scissors. Human nail clippers can work for some cats, but they may crush or split the claw if angled poorly. Dull tools make trimming harder and less comfortable.
Next, choose the right moment. Do not trim nails when the cat is playing hard, hunting toys, eating, guarding food, hiding, or already irritated. Many cats tolerate handling better after a meal, after a nap, or during a calm lap session.
Use cat scratching if nail trimming is part of a furniture-saving plan. A trim reduces sharp damage, but the cat still needs approved scratching surfaces.
The Feeding Loop Behind Nail-Trimming Fights
The fight loop often starts with bad timing. The cat is hungry or asking for food. The owner grabs the paws. The cat pulls away. The owner tightens the hold. The cat struggles harder. The trim becomes a conflict, and the cat remembers the handling as unsafe.
Then the owner avoids trimming for weeks. The nails get sharper. Scratching damage increases. The next trim becomes more urgent, so the owner tries to cut all nails at once. The fight repeats.
A better how to cut the cat’s nails routine breaks that loop with micro-sessions. Touch one paw. Reward. Press one toe. Reward. Clip one tip. Reward. Stop while the cat is still calm.
The Emotional Trigger Owners Miss
The emotional trigger is urgency. Owners usually trim nails after a scratch, furniture damage, or a painful snag. That urgency makes them rush. Cats do not respond well to rushed restraint.
The solution is scheduled maintenance. Check nails weekly. Trim small amounts before the claws become weapons. Build the habit when there is no crisis.
Use scientific pet feeding schedule to keep daily routines predictable. Cats accept handling more easily when care tasks are attached to calm, repeatable moments instead of panic.
The Addiction Mechanism
The addiction mechanism is avoidance relief. The cat struggles, the owner releases, and the cat learns that fighting makes the trim stop. The owner also feels relief and delays the next attempt. Both sides are rewarded for avoidance.
To reverse this, make easy cooperation pay. The cat receives a reward for calm paw touch before resistance starts. The owner stops after a small success instead of pushing until the cat explodes.
Good how to cut the cat’s nails training makes calm behavior more useful than fighting. That requires patience, but it is faster than rebuilding trust after repeated restraint battles.
Know the Claw Anatomy
A cat claw has a clear outer part and a sensitive blood-and-nerve area called the quick. In many cats, the quick looks pink inside the claw. The part you trim is the sharp clear tip beyond the quick. Cutting the quick can cause pain and bleeding.
For cats with darker claws, thick claws, or unclear visibility, trim only the tiny sharp hook at the end. Do not guess deeply. If the nail is curled, thick, embedded, broken, infected, or painful, stop and book veterinary care.
Understanding the quick is the most important technical part of how to cut the cat’s nails. The goal is not to shorten the nail dramatically. The goal is to remove the sharp point safely.
Step 1: Let the Cat Smell the Clippers
Before clipping, let the cat inspect the tool. Put the clippers near the cat during a calm moment. Reward interest. Do not immediately grab the paw. The clipper should become a familiar object, not a warning signal.
For sensitive cats, repeat this for several days. Show clippers, treat, remove clippers. This builds a low-stress association before the first trim.
This step looks slow, but it prevents the common problem where the cat runs as soon as the tool appears.
Step 2: Practice Paw Touch Without Clipping
Touch the cat’s shoulder, leg, and paw briefly. Reward. Do not hold the paw tightly. Do not chase the paw if the cat pulls back. Try again later with less pressure.
When the cat accepts paw touch, gently press the toe pad so the claw extends. Release immediately and reward. Practice this before trimming so the cat learns that toe pressure does not always mean clipping.
If you are learning how to cut the cat’s nails for the first time, this handling stage matters more than the cutting stage.
Step 3: Choose a Safe Position
Some cats do well sitting on the owner’s lap facing away. Some do better on a table with a towel under them. Some tolerate a helper offering treats while the owner clips. Some cats need one nail at a time while resting on a favorite blanket.
Do not pin the cat on its back unless a trained professional has shown you a safe method and the cat tolerates it. Full restraint can make many cats panic.
The best position is the one that keeps the cat stable without making it feel trapped. A calm cat is safer than a tightly held cat.
Step 4: Extend One Claw
Hold the paw gently. Press the top of the toe and the toe pad lightly so the claw extends. Look for the sharp curved tip. Locate the quick if visible.
If the cat pulls away, release. Do not clamp down harder. Wait, reward calm behavior, and try one toe again. For many cats, the release itself builds trust.
This is where many trims fail. The owner tries to control the whole paw. The better method is one toe, one small clip, one reward.
Step 5: Clip Only the Tip
Cut only the clear sharp point. Keep the clip small. It is better to trim too little than too much. The nail should lose its needle-like point, not be cut back close to the paw.
Clip with a steady motion. Avoid twisting the claw. If the clipper crushes instead of cuts, replace or sharpen the tool. A rough trim can make the cat more resistant next time.
A practical how to cut the cat’s nails rule is this: if you are unsure, take less.
Step 6: Reward Immediately
Reward immediately after the clip. Use a tiny treat, lickable treat, praise, or play depending on what the cat values. Timing matters. The reward should follow calm handling and clipping, not fighting.
If using treats, keep them small and counted. Nail trimming should not become a full extra meal. Consistent rewards teach cooperation without disrupting feeding control.
Use why is my cat always hungry even after eating if treats during care tasks are turning into daily overfeeding pressure.
Step 7: Stop Early
Stopping early is a skill. If the cat calmly allows one nail, stop and reward. Do not push for ten more because “it is going well.” Many cats become resistant because owners keep going until the cat has to escalate.
Build from one nail to two nails, then one paw, then more only when the cat remains relaxed. Some cats will always do best with short sessions spread across the week.
For difficult cats, how to cut the cat’s nails may mean trimming two nails per day instead of all nails once per month. That is acceptable.
What If You Cut the Quick?
If you cut the quick, stay calm. Apply gentle pressure with clean gauze or a clean cloth. Styptic powder can help stop minor nail bleeding if you have it. Keep the cat calm and prevent licking or running around until bleeding stops.
If bleeding does not stop, the nail is torn, the cat is very painful, or the injury looks serious, contact a veterinarian. Do not keep trimming after a painful cut. End the session and rebuild trust later.
One mistake does not ruin everything, but repeating deep cuts will make future nail care much harder.
How Often Should You Cut Cat Nails?
Many indoor cats need nail checks every one to two weeks, but the right schedule depends on age, activity, scratching habits, nail growth, and whether the cat is senior or inactive. Some cats need only light tip trims. Others need more frequent care.
Check front claws more often because they usually cause most scratches and snags. Do not forget dewclaws. These can become overgrown because they do not contact scratching surfaces the same way.
A weekly nail check is easier than an emergency trim after the claw hooks into fabric, carpet, or skin.
Kitten Nail Trimming
Kittens should learn nail handling early. Start with paw touch, toe press, and tiny tip clips. Keep sessions extremely short. Reward heavily. Do not wait until the kitten becomes a strong adult with no handling practice.
Kitten claws are small and sharp, so take only the very tip. If the kitten is too wiggly, trim one nail while sleepy or after play. Never turn kitten grooming into a chase game.
A kitten that learns calm paw handling early will be much easier to care for as an adult.
Senior Cat Nail Care
Senior cats may need more nail care because they scratch less, move less, or develop thicker claws. Overgrown claws can curl toward the paw pad and become painful. Long nails can also make walking, jumping, or gripping surfaces harder.
Check senior cat nails regularly, including dewclaws. If nails are thick, brittle, curled, or embedded, do not force a home trim. Ask a veterinarian for help.
For senior cats, how to cut the cat’s nails should include comfort. Handle gently, support the body, avoid painful joints, and keep sessions brief.
What If the Cat Fights?
If the cat fights, reduce the difficulty. Do not hold harder. Go back to paw touch and rewards. Try trimming after a nap. Use a helper for treats. Clip one nail only. Change the position. Use a towel only if it calms the cat and does not create panic.
If the cat bites, scratches aggressively, screams, pants, or panics, stop. Some cats need professional trimming, medication-assisted grooming plans, or behavior training through a veterinarian.
The goal is not to prove you can overpower the cat. The goal is to maintain safe claw care for years.
Nail Trimming and Scratching Posts
Nail trimming does not replace scratching posts. Cats still need to scratch after their nails are trimmed. Scratching stretches muscles, marks territory, and sheds claw layers. If the cat has no approved outlets, it will use furniture.
Place scratching posts near sleep areas, windows, doors, and damaged furniture. Offer both vertical and horizontal options if needed.
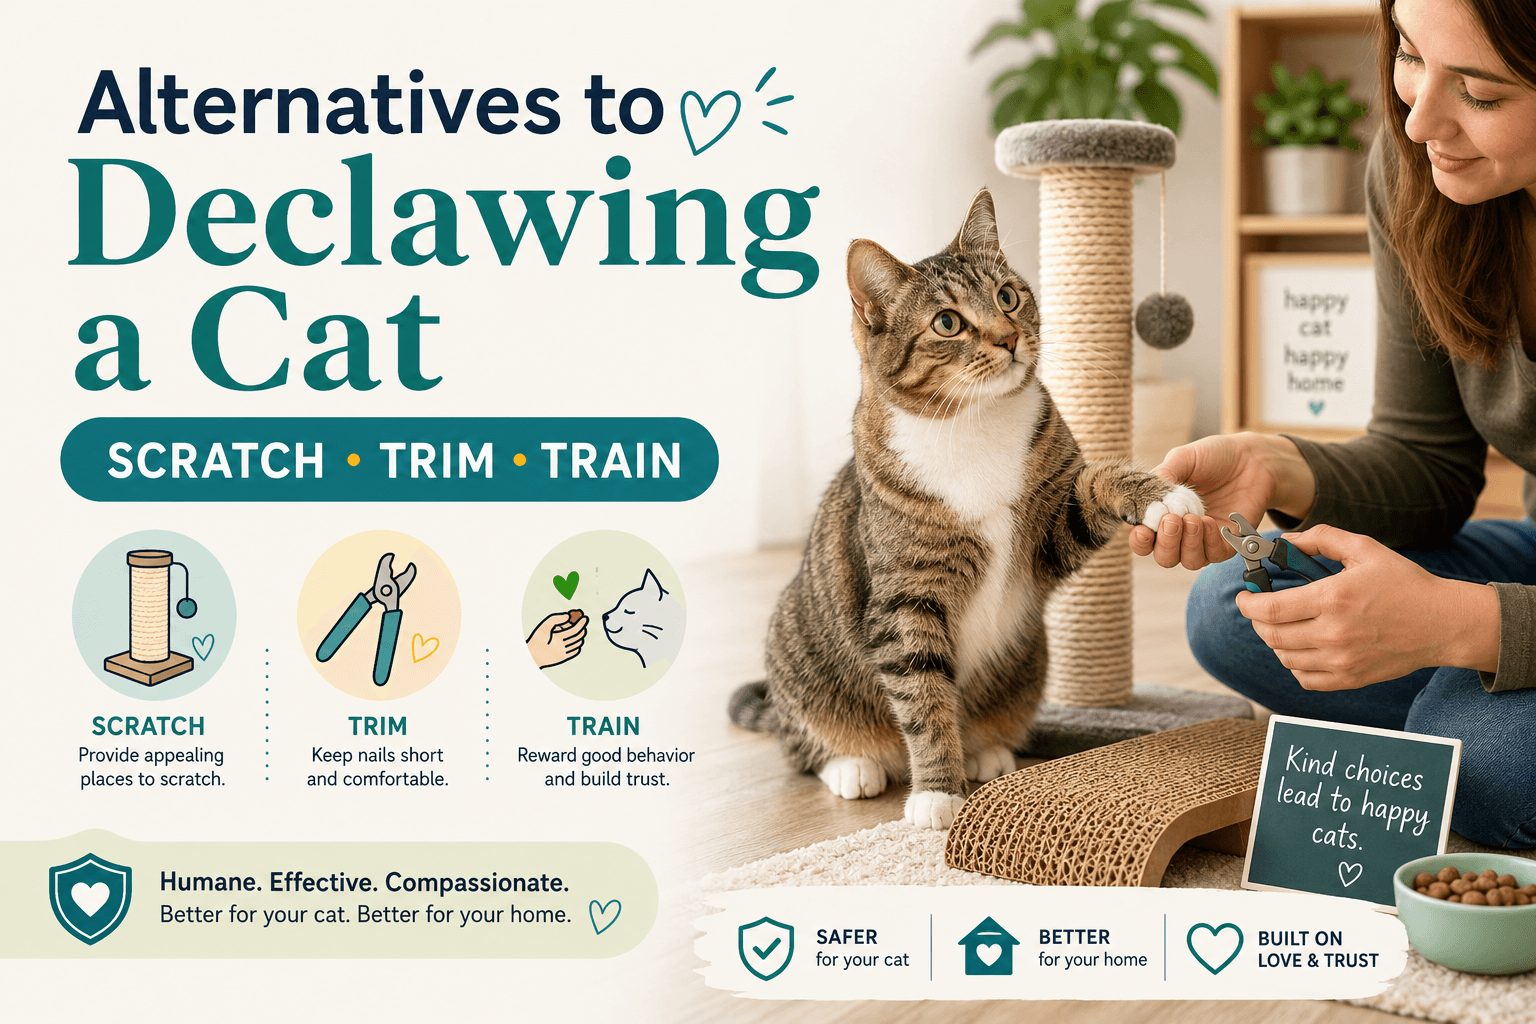
Use alternatives to declawing a cat. A full claw-care plan includes nail trims and legal scratching surfaces.
Nail Caps After Trimming
Nail caps can be applied after a trim when the owner needs extra furniture or skin protection. They must fit correctly and should not be forced onto painful, infected, or damaged claws.
Nail caps are temporary. They shed as claws grow and need replacement. They should be monitored so they do not cause discomfort or trap debris.
For some homes, nail caps are useful while the cat learns scratching post habits. They are not a substitute for trimming, scratching outlets, or behavior training.
Clean Tools and Safe Storage
Keep nail clippers clean and dry. Wipe them after use. Store them where pets and children cannot access them. Replace dull tools because poor cutting increases pressure on the claw.
Do not share dirty tools between pets if one has a nail infection or skin problem. If you see swelling, redness, discharge, broken claws, or persistent licking at a paw, schedule veterinary care.
The same hygiene mindset applies to feeding equipment. Use clean smart pet feeder so daily pet care stays orderly rather than reactive.
Feeding Rewards Without Overfeeding
Rewards help nail trimming, but they should be measured. Use tiny treats, a lick mat with a small amount of cat-safe food, or part of the cat’s normal meal. Avoid giving large snacks every time a paw is touched.
If your cat is on a weight plan, subtract training treats from daily intake. If using an automatic feeder, keep manual feeding controlled so grooming rewards do not break the schedule.
Use how much should my cat weigh and pet feeder calibration. Grooming rewards should support cooperation without quietly increasing calories.
Common Failure Pattern
The most common failure pattern is trying to cut every nail in one session after waiting too long. The cat resists, the owner grips harder, the cat fights, and the next trim becomes worse.
The second failure is cutting too close to the quick. One painful mistake can make the cat suspicious for weeks. Clip only the tip.
The third failure is skipping rewards. Cats need a reason to cooperate. Calm handling should predict something good, not only restraint.
Real-World Impact
The real-world impact of learning how to cut the cat’s nails properly is quieter claw care. Furniture damage drops. Skin scratches hurt less. The cat snags fabric less often. The owner stops dreading grooming day.
The impact of poor trimming is predictable: cat resistance, bleeding quicks, skipped maintenance, sharper claws, furniture damage, and owner frustration. Nail care is small, but it affects the whole home.
For cat households building better daily routines, compare the cat feeders collection. Predictable feeding routines support calmer handling, especially for cats that become difficult when hungry.
Can This Be Fixed?
Yes, most nail-trimming problems can be improved with a slow reset. Spend one week touching paws without clipping. Then clip one nail and reward. Add more nails only when the cat remains calm. Use sharp tools. Trim only tips. Stop before resistance escalates.
If the cat is dangerous to handle, has painful paws, has overgrown nails, or has nails curling into the pads, use professional veterinary help. A home trim is not worth injury to the cat or owner.
For broader routine support, start with the smart feeders collection. A calmer routine around food, play, grooming, and scratching makes nail care easier to maintain.
Who Should Walk Away and Who Should Use This
Walk away from forcing all four paws at once, cutting deep, punishing resistance, using dull clippers, or trimming when the cat is already upset. Also walk away from treating nail trimming as a replacement for scratching posts.
Use this how to cut the cat’s nails guide if your cat scratches furniture, snags blankets, hurts people during play, resists grooming, has sharp indoor claws, or needs nail caps. It is especially useful for kittens, indoor cats, senior cats, newly adopted cats, and owners trying to avoid destructive scratching without declawing.
For scheduled meals during grooming training, a timed slow feed automatic feeder can help keep food timing predictable. Calm feeding and calm grooming often support each other.
Mini FAQ
How do I cut the cat’s nails safely?
Cut the cat’s nails by gently pressing the toe to extend the claw, identifying the pink quick, and clipping only the clear sharp tip. Reward immediately and stop if the cat becomes tense.
How far should I cut cat nails?
Cut only the small sharp hook at the end of the nail. Do not cut close to the pink quick. If you are unsure, trim less.
What happens if I cut the quick?
If you cut the quick, the nail may bleed and hurt. Apply gentle pressure with clean gauze and use styptic powder if available. Contact a veterinarian if bleeding does not stop or the nail looks badly injured.
How often should I trim my cat’s nails?
Many indoor cats need nail checks every one to two weeks, but the exact timing depends on growth, scratching activity, age, and nail condition.
What if my cat will not let me trim nails?
Start with paw-touch training, reward calm handling, clip only one nail per session, and stop before the cat panics. Use a veterinarian or cat-experienced groomer if the cat is unsafe to handle.
Do cats still need scratching posts after nail trims?
Yes, cats still need scratching posts after nail trims. Trimming reduces sharpness, but scratching is still needed for stretching, marking, and claw maintenance.
The best answer to how to cut the cat’s nails is small and steady. Use sharp clippers, choose a calm moment, press one toe, clip only the tip, reward immediately, and stop early. When nail care becomes predictable instead of forceful, the cat has less reason to fight and the owner has fewer reasons to delay the next trim.